Self studies
6/5/2024 - 28/5/2024
Tan Jian Xin
Self studies
Sketchbooks drawings
Reference
As I was at a shopping mall doing some shopping with my friend, I came across this numbered painting which caught my eye and I've took a picture of it to draw.
Drawings / Illustrations
Character designs
Background design
Tips
- Composition
- Staging
- Perspective
Advantages of 2D backgrounds is we can play with
- Composition
- Colour
- Shape
- Style
Life drawing and observational drawing
Figure 1.1: Numbered painting
Drawings / Illustrations
Figure 2.6: Line practice + 1 point perspective
Figure 2.7: Black and pink illustrations
Figure 2.8: Random sketches
Figure 2.7: Black and pink illustrations
Figure 2.8: Random sketches
Tips
Character designs
For the character below, I wanted to make her to look like a college student at first. Then, I realized I could draw her as a short college student with anger issues.
Figure 4.4: Student 1 turnaround + expression
For the character below as well, I wanted him to look taller as well (have to practice proportion more).
Figure 4.5: Student 2 sketch
Figure 4.6: Student 2 poses
For the expressions shown below, I think I can improve more on the size of the character as it seems inconsistent.
Figure 4.7: Student 2 expressions
Background design
Tips
- Composition
- Staging
- Perspective
Advantages of 2D backgrounds is we can play with
- Composition
- Colour
- Shape
- Style
Biggest background tip: Observational drawing
Life drawing and observational drawing
Short animations
As I just started to learn the foundations of animation such as stretch and squash, speed, timing, anticipation and many more, I tried to make some simple and short animation as shown below. I created this animation using the ibisPaint X app on my phone, then I created a gif as shown below.
Happy emoji symbol (GIF)
Reflection on why I’ve chosen animation as my specialist subject
Happy emoji symbol (GIF)
Animation exercise
Animation exercise 2
The Silent Killer
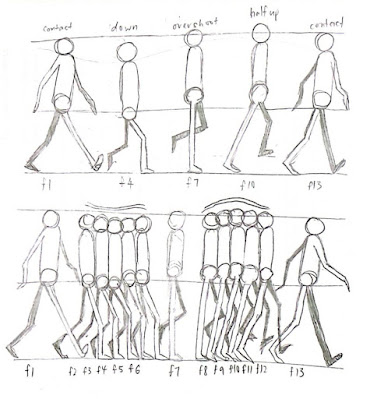
Walking exercise - Rough sketch (12 fps)
Walking exercise - Rough sketch (8 fps)
Walking exercise (12 fps)
Walking exercise (8 fps)
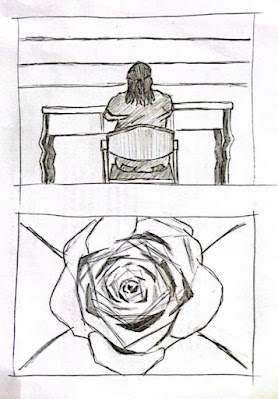
Storyboards
Storyboard tips
- Screen direction (maintain the general screen direction when a character is moving. Unless he changes direction on-screen)
- Whenever you "cut", place your character in the same general screen position (especially useful when a character is moving)
- Watch out for tangents in storyboard
Rough sketches storyboard
After I’ve started watching anime, I've been wanting to know how animation works. As I start to learn more about animation, I realized that the story is more important than the animation/illustration. However, it would add points to the overall animation if the characters are relatable, interesting, engaging and many more. Other than that, I find animation is challenging as it requires the animator to be a lot more observant as it requires more than one pose for only a second of animation as it usually has 12 frames per second (fps).
Why I chosen BA animation course at Middlesex University
I’ve chosen the BA animation course at Middlesex University as I would love to improve my skills in creating various engaging, interesting and fun animations. Besides, I would also like to be more independent by studying abroad and making more new friends.
Adobe Animate (An)
I started to learn Adobe Animate through the tutorial shown below.
Then, I continued to learn how to animate with another tutorial, shown below by making the head and the trunk of the doll move.
Adobe Animate (An)
I started to learn Adobe Animate through the tutorial shown below.


Comments
Post a Comment