Video and Sound Production Exercises
1.9.2023 - 27.9.2023 / Week 1 - Week 5
Tan Jian Xin / 0350784
Video and Sound Production / Bachelor of Design (Hons) in Creative Media
Exercises
LECTURES
Week 1
Week 3
INSTRUCTIONS
Week 1
Mr. Martin taught us how to use Adobe Premium Pro (Pr) in class.
Week 1
Week 2
Week 3
Week 4
Week 5 - Production shoot
Week 6
Week 5 - Production shoot
Week 6
Week 7
Week 8 - ILW
Week 9
Week 9
INSTRUCTIONS
Week 1
Mr. Martin taught us how to use Adobe Premium Pro (Pr) in class.

Figure 1.1: Mints (Week 1, 1/9/23)
Mints Advertisement
Then, we are required to arrange shots on timeline with proper order for the doritos advertisement by ourselves.Mints Advertisement
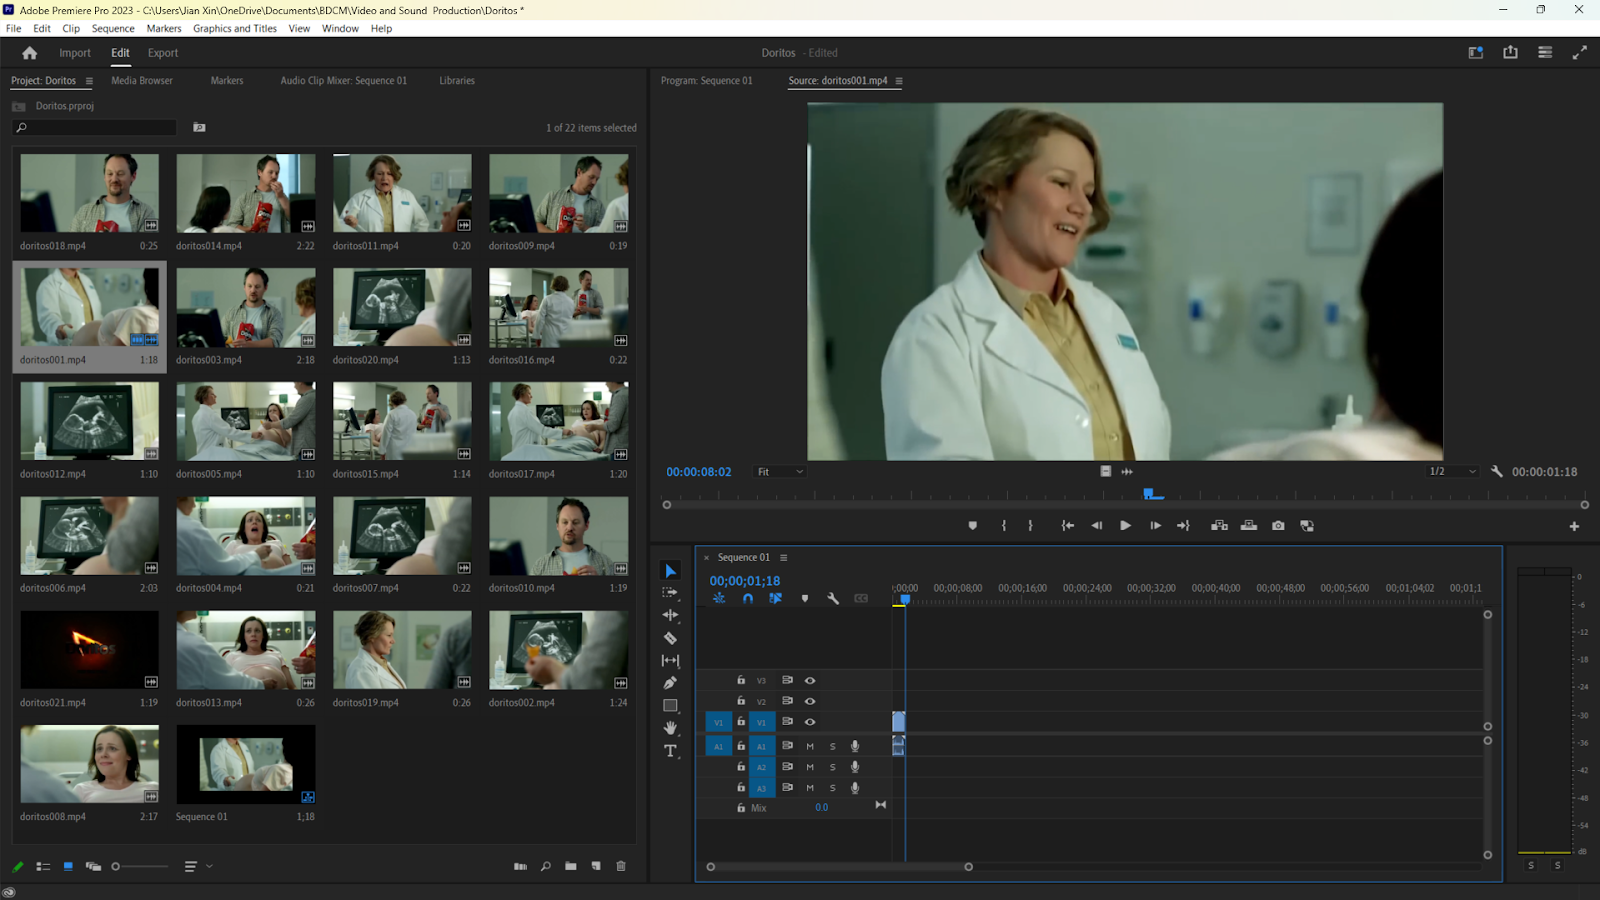
Figure 1.2: Doritos (Week 1, 1/9/23)
Doritos Advertisement
Doritos Advertisement
Week 2
In this week, we are instructed to shoot the shot sizes below:
- Low angle wide shot
- Frontal MCU (soft background)
- Frontal MS (soft background)
- Extreme close-up shot
- Side angle MS (soft background)
- ¾ angling MCU shot (with blurry/soft foreground)
- Close-up shot
- Eye-level medium-wide shot
Shooting exercise: Framing
However, I did an extra shot, over the shoulder shot (OS) as practice with my friend, Jia Ern.
We also did our first editing exercise of the short film, Lalin. We are taught on how to add effects such as cross dissolve and dip to black in this exercise.

Figure 2.1: Editing exercise screenshot (Week 2, 8/9/23)
Lalin - edited (35 seconds version)
Week 3
3 Act Structure Exercise (Guang, 2011, and Lalin, 2005)
Week 4
We received feedbacks for our audio dubbing exercise. I made alterations to the video after receiving feedbacks from Mr. Martin.
In this week, we are instructed to shoot the shot sizes below:
- Low angle wide shot
- Frontal MCU (soft background)
- Frontal MS (soft background)
- Extreme close-up shot
- Side angle MS (soft background)
- ¾ angling MCU shot (with blurry/soft foreground)
- Close-up shot
- Eye-level medium-wide shot
Shooting exercise: Framing
However, I did an extra shot, over the shoulder shot (OS) as practice with my friend, Jia Ern.
Figure 2.1: Editing exercise screenshot (Week 2, 8/9/23)
Lalin - edited (35 seconds version)
Week 3
3 Act Structure Exercise (Guang, 2011, and Lalin, 2005)
Week 4
We received feedbacks for our audio dubbing exercise. I made alterations to the video after receiving feedbacks from Mr. Martin.
Ambience + sound effects + dialogue (Attempt #2)
Week 5
Production shoot
Week 6
Fixing color and exposure of video. After adding the comparison button, we changed the Waveform to Luma.

Figure 6.1: Changing workspace (Week 6, 6/10/23)
See only highlight, midtone and shadow when heard exposure. (Black and white)
- 0-10 shadows
- 70+ highlights
- 100 exposure (plain white)
Both graphs are the same (shown below). The only difference is the left graph is black and white while the right graph is RGB.

Figure 6.2: Graph of colors (Week 6, 6/10/23)
We added an adjustment layer to our project. Then, we placed it above our video to create a filter (red, green, blue, brown, teal and orange) to our film.

Figure 6.3: Adding adjustment layer (Week 6, 6/10/23)
Production shoot (music + color correction + color grading)
Week 7
We were taught to use Adobe Audition (Au) for sound shaping exercise. After importing the audio, we were instructed to add a multitrack.
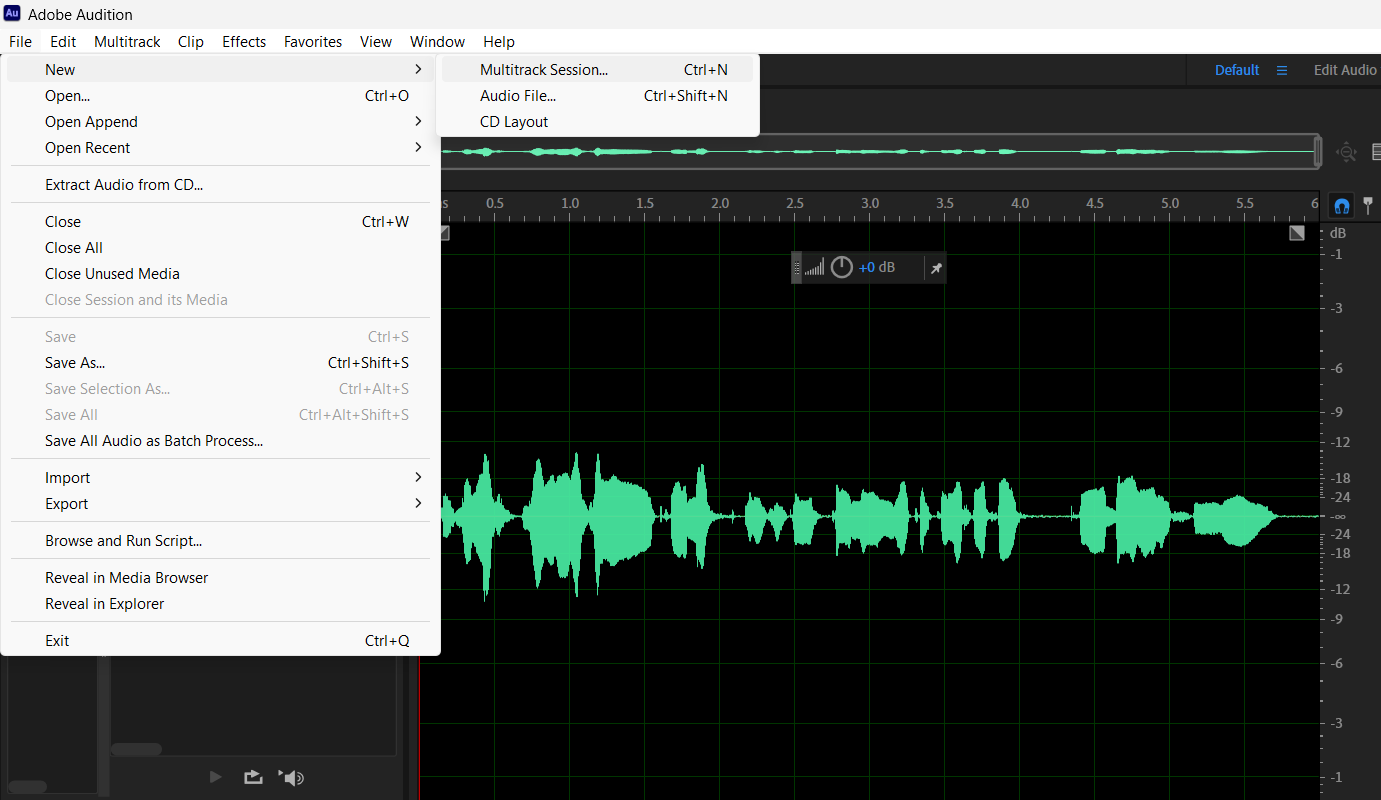
Figure 7.1: Adding multitrack for editing

Figure 7.2: Adding parametric equalizer in Adobe Audition (Au)


Figure 7.5: exporting entire session of multitrack mixdown

Figure 7.6: Trying out sounds from toilet, cave, closet, and alien
Week 8 - ILW
Week 9
While the time line is empty, as shown below, drag and drop the scene to the timeline.

Figure 8.1: Empty time line

Figure 8.2: Drag and drop folder
To check the properties, right click and choose properties

Figure 8.3: properties
After changing the settings in preference to 25 frames, I imported the files, by clicking ImporterJPEG Sequence and Force alphabetical order shown below.

Figure 8.4: Import multiple files in After Effects (Ae)

Figure 8.5: adjust speed
FEEDBACKS
Week 4
Be aware of the followings:
- Stomping on ground (first step after getting off car)
- Ambience at every scene (overlap as I check volume)
- Squeaky sound of opening wooden door
- Lower volume while hearing from phone
- Lighter street ambience
- Include fade in and fade out for every audio
Week 9
Add effects and texts to insta/tiktok video treatment.
REFLECTIONS
Week 1:
The exercise is easy to get to know Adobe Premiere Pro, Pr. It's fun to drag the video straight away to the sequence.
Week 2:
The framing exercise is fun to learn about the shot sizes. The editing exercise is a little bit annoying as I need to play the video multiple times to check the in point and out point of the short clip. However, the effects are satisfying to watch after adding it to the video.
I got to know the 3-acts-structure used in film. However, identifying them is a little hard for me.
After editing it for two days, I have to change most of the audio clips. I'm speechless.
Week 5:
Production shoot is very fun but it's damn hot.
Week 6:
Color correction and color grading is a little bit difficult for me.
Week 7:
All the assignments from other modules came flowing in and it's a little hectic for me to cope. However, the sounds is fun to mess with. According to Mr. Martin, we should not be afraid to make mistakes as it is a learning process. Thus, I went playing with sounds in Adobe Audition (Au).
Week 10:
I learnt how to create a short stop motion in a group of 4 peoples (including me) with my friends using clay at Taylor's University's studio.
Week 11:
I created my proposal for my stop motion. As Mr. Martin suggested students that would like to take animation as a specialization in the future to complete this task individually instead of 2 people, I took his suggestion and came up with the proposal by myself.
Week 12:
I created the sketches for my character and changed the title for my stop motion from "Disappearing Ronin" to "Shadows of the Silent Ronin".
All the assignments from other modules came flowing in and it's a little hectic for me to cope. However, the sounds is fun to mess with. According to Mr. Martin, we should not be afraid to make mistakes as it is a learning process. Thus, I went playing with sounds in Adobe Audition (Au).
Week 8:
Independent learning week
Week 9:
I learnt how to import one scene in Adobe Premiere Pro (Pr) and Adobe After Effects (Ae) to create a stop motion.
Independent learning week
Week 9:
I learnt how to import one scene in Adobe Premiere Pro (Pr) and Adobe After Effects (Ae) to create a stop motion.
Week 10:
I learnt how to create a short stop motion in a group of 4 peoples (including me) with my friends using clay at Taylor's University's studio.
Week 11:
I created my proposal for my stop motion. As Mr. Martin suggested students that would like to take animation as a specialization in the future to complete this task individually instead of 2 people, I took his suggestion and came up with the proposal by myself.
Week 12:
I created the sketches for my character and changed the title for my stop motion from "Disappearing Ronin" to "Shadows of the Silent Ronin".
Week 13:
I cut out my sketches and shoot my stop motion. I realized that the pictures are not enough for 30 seconds after the shoot, however, I really liked how it turned out.
Week 14:
I can't believe I've edited my own stop motion all by myself. This module is very interesting to me as it could tell a lot by only visuals and sound effects.


Comments
Post a Comment